Are you just getting started with your Dell laptop? It can be intimidating, but with the right steps, you'll be up and running in no time. In this guide, I’ll show you how to use your Dell laptop like a pro. From setting up the laptop to mastering all the built-in features, I’ll teach you everything you need to know about using a Dell laptop. You’ll learn about navigating the desktop, adjusting settings, and customizing your laptop for optimal performance.
Setting Up Your Dell Laptop
The initial step after purchasing a new Dell laptop is setting it up correctly. Then’s a step-by-step companion to help you through the process.
1. Unpack the box:
Unpack the package first, then look through the contents for any signs of damage. You can go to the following stage once you have verified that everything is in order.
2. Power on the laptop:
Pressing the power button will initiate the first startup of your Dell laptop. To finish the first setup process, adhere to the on-screen directions. Your preferred language, time zone, and other fundamental options will be shown to you.
3. Connect to the Internet:
You need to go online to use your Dell laptop well. There are two methods for doing this: using an Ethernet wire or Wi-Fi.
4. Install Dell-installed software:
Your Dell laptop has some software already. But you may need more software for what you want to do. Some common Dell-installed software includes Dell SupportAssist, Dell Update, and Dell Digital Delivery. You can find these and other supplementary software on the Dell website for download.
5. Customize settings:
You’re almost done! You’ve got the basics set up and you’re online. Now let’s make this device yours by tweaking some settings. This includes personalizing the desktop background, screensaver, and other settings that you prefer.
6. Create user accounts:
Want to let others use your Dell laptop too? No problem! You can make separate accounts for them easily. Just go to “Settings” and “Accounts” and choose “Family & other users”
7. Update your laptop:
You’re almost done setting up your device! But before you start using it, make sure you have the latest updates. Just go to “Settings” and “Update & Security” to check. This will guarantee that your Dell laptop is current and working smoothly.
Key Takeaway: Don’t worry, setting up your new Dell laptop is a breeze! Just follow the steps above and you’ll be ready to go. You can make your device suit your style and needs in no time.(alert-passed)
Getting Familiar with Your Dell Laptop
You might feel a bit nervous if you’re new to using a laptop. But don’t worry, it’s not hard at all! Just follow these simple steps and you’ll get to know your Dell laptop in no time. You’ll be using it like a pro soon enough.
1. Turning on your Dell laptop
To turn on your Dell laptop, locate the power button. Look for the power button above the keyboard or on the side of your laptop. It’s usually a circle with a line through it. Push and hold it until you see the Dell logo on your screen. Then let go of the power button and wait for a few seconds. Your laptop will start up and show you the operating system.
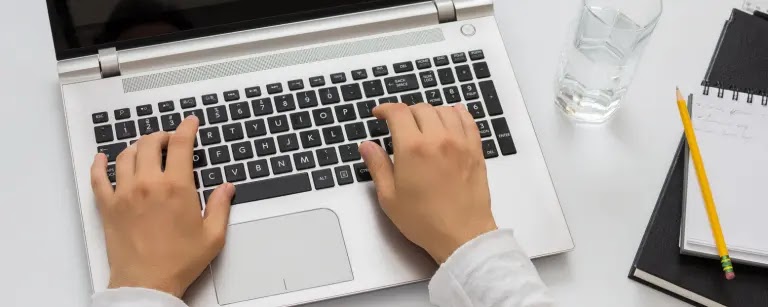
2. Using your Dell laptop keyboard
Your Dell laptop keyboard is your primary way to interact with your device. Familiarizing yourself with the keys and shortcuts will greatly improve your experience. Here are a few tips:
The Windows button, found on the bottom left of the keyboard, is used to access the Start menu.
To copy and paste text or images, use the Ctrl + C and Ctrl + V keyboard shortcuts.
When typing, pay attention to the Caps Lock key. If it's on, all of your letters will be capitalized.
To take a screenshot, press the Windows key + Print Screen key at the same time.
3. Setting up your Dell laptop
Got a new Dell laptop? Awesome! But before you can have fun with it, you’ll need to do some setup. Don’t worry, it won’t take long. Follow these steps:
Turn on your laptop if it is off. Then go online with Wi-Fi.
Choose your language, region, and keyboard preferences.
Use your Microsoft account to sign in. Or make a new one.
Follow the prompts to finish setting up your laptop and configure your privacy settings.
4. Navigating your Dell laptop
You’re all set! Now you can have fun with your Dell laptop. There are so many things you can do on your desktop and apps. Here are some cool things to try out:
The desktop: This is where you can quickly access the things you use the most.
The taskbar: Located at the bottom of the screen, this bar contains icons for open programs and system notifications.
The Start menu: Click the Windows button to open the Start menu. You’ll see all the apps you have on your laptop there.
Key Takeaway: You'll get the hang of your Dell laptop in no time. It’s easy to learn how to use it. Just give it a try and you'll see.(alert-passed)
Navigating Through the Operating System
You’re done setting up your Dell laptop! Now you can start exploring the operating system and see what it can do. Dell laptops usually come with Windows 11 installed, which is a modern and user-friendly operating system.
Start Menu
Start by selecting the Start button in the lower-left corner of your screen. This will show you the main menu with all the things on your Dell laptop.
Main Menu
On the Start menu's upper left, select the rectangle button. Your frequently used applications, such as File Explorer, Settings, and Power, will be displayed.
On-Screen Prompt
Don’t worry if you don’t know what to do next. Windows 11 will help you with a prompt on your screen. Just see the prompt and do what it says.
Examples of Power Button
To turn off your Dell laptop, just press the power button. You can find it on the side or top of your laptop. It looks like a circle with a line through it. There are two types of power buttons on Dell laptops: a rectangular button and a round button with a LED light. The following are some illustrations of what they might resemble:
Rectangular Button: The laptop's right side or the area above the keyboard typically house this type of power button. It's a flat button that you can press to turn your on or off your laptop.
Key Takeaway: Using your Dell laptop is a breeze. You can find everything you need from the Start menu to the main menu. Just click on what you want to do. If you get stuck, Windows 11 will help you out with some tips on your screen. And when you’re done, just press the power button. It might be a rectangle or a circle with a light on it.(alert-passed)
Using Your Dell Laptop's Keyboard
When it comes to using your Dell Laptop, understanding how to navigate the keyboard is essential. As you begin, consider the following advice:
Get to know your keyboard: Your Dell laptop keyboard is like most keyboards, but some keys might be in different places. Spend some time becoming acquainted with the layout and contrasting it with other keyboards you may have used.
Using the touchpad: Most Dell Laptops also come with a touchpad instead of a traditional mouse. Study the touchpad's features, including scrolling, clicking, and right-clicking.
Shortcut keys: Dell Laptops come equipped with a variety of shortcut keys that can help you work faster and more efficiently. For example, if you press the “Windows” key, you’ll see the Start menu. And if you press “Ctrl” and “Z”, you’ll go back to what you did before.
Customizing your keyboard: You can change your Dell Laptop keyboard if some keys are hard to press, or you want a different layout. Dell Laptops come with optional software such as the Dell Power Manager, which allows you to customize the function keys and even set up your own window and command center!
By taking the time to understand your Dell Laptop's keyboard and features, you can work faster and more efficiently. Customizing the keyboard with optional software such as the Dell Power Manager, allows you to have a personalized experience that fits your specific needs.
Key Takeaway: Knowing how to navigate your Dell Laptop keyboard can help streamline your work and make your computing experience more efficient.(alert-passed)
Connecting Your Dell Laptop to the Internet
One of your priorities after setting up your new Dell laptop will be to establish an internet connection. You can use the following procedures to get online:
1. Check Your Wireless Connection:
The best way to go online is with a wireless connection. Your Dell laptop has a wireless adapter that lets you join Wi-Fi networks.
In the taskbar (bottom right corner of your screen), locate the Wi-Fi icon to check your wireless connection. If the icon has a red X next to it, your wireless connection may be turned off. If you want to get back online, tap the little picture and choose “Turn Wireless On”. Sometimes that doesn’t do the trick, though. In that case, you’ll have to figure out what’s wrong and fix it.
2. Use an Ethernet Cable:
An Ethernet cable can be used if Wi-Fi isn't functional. Connect the cable's first end to your laptop and its second end to your modem or router.
Turn on your network or modem first. Then plug in the cable. Once you've connected the cable, your laptop should automatically detect the connection and allow you to surf the web.
3. Troubleshoot Connection Issues:
Try the troubleshooting techniques listed below if you have any issues connecting to the internet:
your laptop, start it up
your modem or router, and restart
To ensure that your network settings are configured properly, check them.
If there are any reported outages in your region, contact your internet service provider.
Key Takeaway: To set up your new Dell laptop, you need to connect it to the internet. You can use Wi-Fi or an Ethernet cable for this. If you face any problems, try troubleshooting them. If that doesn’t work, contact your internet service provider for help.(alert-passed)
Setting Up Windows on Your Dell Laptop
Setting up Windows on Your Dell Laptop can be a daunting task for beginners. However, by incorporating the essential hardware and software, Dell makes it simple for users to set up their laptops. Here's a step-by-step guide to setting up Windows on your Dell Laptop:
- Creating a Windows installation USB using Dell Digital Delivery Tool
- First and foremost, download and install the Dell Digital Delivery Tool on your current PC.
- Next, launch the Dell Digital Delivery Tool and search for "Windows 11" in the search bar.
- When you see it, hit “Download” and do what it says to finish the download.
- After the download is complete, plug a 16 GB USB key into your PC.
- Launch the Dell Digital Delivery Tool once again, select the Windows installation file in the "Available Downloads" section, and create a bootable USB key labeled "Windows 11 Installer".
- Installing Windows on your Dell Laptop
- To access the boot menu, turn on your Dell laptop and press the F12 key when you see the Dell logo.
- Select "UEFI Boot" and "USB Storage Device" to boot from the previously created USB key.
- Follow the prompts to install Windows on the laptop, making sure to select the correct language, time zone, and keyboard layout.
- Once you reach the "Installation Type" screen, select "Custom: Install Windows only (advanced)".
- Choose the partition where you want to install Windows, then click "Next" to begin the installation process.
Key Takeaway: Setting up Windows on your Dell Laptop can be easy with the right tools and instructions. Creating a Windows installation USB using Dell Digital Delivery Tool and following the prompts ensures a smooth and successful installation.(alert-passed)
Troubleshooting Your Dell Laptop
No matter the inherent user-friendliness of your Dell laptop, occasional complications may arise during its operation. Within this segment, we aim to furnish you with a compendium of remedial suggestions to effectively address prevalent issues.
1. Restart Your Laptop:
In the eventuality of encountering any predicaments with your Dell laptop, the foremost course of action entails attempting a system reboot. By restarting, you can refresh its system and flush out any errors that might be causing the problem.
2. Check the Power Supply:
Check if the laptop is receiving an adequate power supply by disconnecting and reconnecting the power adapter. Inspecting the battery's state of charge may also be a good idea. If the battery isn't charged, charge it for a while and try restarting the laptop again.
3. Run the Diagnostic Tests:
Dell laptops are equipped with integrated diagnostic utilities that facilitate the identification and resolution of both hardware and software complications. To run diagnostic tests, restart your Dell laptop and press the F12 key continuously. Within the Boot Menu interface, designate the "Diagnostics" option by highlighting it and pressing the "Enter" key. Subsequently, adhere to the on-screen directives to finalize the testing procedure.
4. Use the Recovery Media:
In the circumstance where the operating system or the hard drive encounters a catastrophic failure, contemplating the utilization of recovery media to restore the laptop to its original factory settings becomes imperative. It is vital to note that this undertaking necessitates a considerable duration. However, it guarantees the restoration of the laptop to a pristine state while concurrently eradicating all existing data and personal content.
5. Visit Dell's Knowledge Base Article:
Should you come across any enduring laptop issues that persist despite diligently adhering to the aforementioned guidelines, availing yourself of Dell's Knowledge Base Article is highly recommended. This all-encompassing compendium serves as a definitive resource, furnishing practical resolutions to prevalent laptop dilemmas, accompanied by meticulous, easy-to-follow instructions, and an extensive compilation of frequently asked questions.
Key Takeaway: To fix a Dell laptop, you need to follow some steps. These include restarting the laptop, checking the power supply, running diagnostic tests, using recovery media, and reading Dell’s Knowledge Base Article. These methods can solve most laptop problems. But if they don’t work, you should get help from a skilled technician. They can handle complex laptop issues.(alert-passed)
Playing Media on Your Dell Laptop
The media player on your Dell laptop lets you watch movies, listen to music, and view images. Utilizing it is quite simple.
Choosing a Media Player:
Dell laptops come with Windows Media Player pre-installed, which can play the most common audio and video formats.
You can use other players like VLC or Winamp. You can get them from their websites.
Playing a DVD or Blu-ray Disc:
To play a disc on your laptop, put it in the disc drive. The player will start by himself.
Some discs need extra software to play. You may have to buy it.
Playing Music:
Windows Media Player makes it easy to play your music library. Simply open the app and navigate to your music folder.
Windows Media Player also has a built-in equalizer and visualizations to enhance your listening experience.
Viewing Photos:
The Photos app that comes with Windows 11 makes it simple to view and organize your photos. Go to the folder containing your photographs after opening the app.
You may view, edit, and share your photographs from there.
Playing Videos:
Media players like Windows Media Player and VLC can play the most common video formats. To play a video, open the app and find your video.
You can also play videos from other devices. Move them to your Dell laptop first.
Key Takeaway: Indulging in multimedia content on your Dell laptop is effortlessly facilitated through the inclusion of a built-in media player and supplementary software alternatives. Whether immersing yourself in a captivating film, savoring melodic harmonies, or perusing a visual gallery of cherished photographs, Dell laptops deliver an exceptional media experience, meticulously tailored to cater to the discerning preferences of their esteemed users.(alert-passed)
>Must Read: LG Gram Laptop Gets A New Processor Upgrade
Conclusion
To sum up, using a Dell laptop may seem scary at first. But with these helpful tips and tricks, you will master its features quickly and easily. From setting up your new Dell laptop with Windows 11, to learning the keyboard and the settings, you have now built a strong base for a great user experience. To keep your system running well and safe, you need to do regular maintenance and security checks. As you start this new journey, you can use your new knowledge to enjoy your Dell laptop’s full potential. If you need more help or advice, our team is ready to help you, or you can visit our website to find more useful resources for your Dell laptop experience.
FAQ
To adjust the screen brightness, press the Fn key on your keyboard along with the corresponding function key that has a sun symbol or brightness icon.
Yes, many Dell laptops allow RAM upgrades. Check the user manual or Dell's website for specific instructions on how to upgrade the RAM for your model.
Press the PrtScn (Print Screen) key on your keyboard to capture the entire screen. To capture only the active window, press Alt + PrtScn.
Yes, Dell laptops are equipped with Bluetooth functionality. To connect a Bluetooth device, enable Bluetooth on your laptop, put the device in pairing mode, and search for it in the Bluetooth settings. Once found, click on it to establish a connection.


please do not enter any spam link in the comment box.